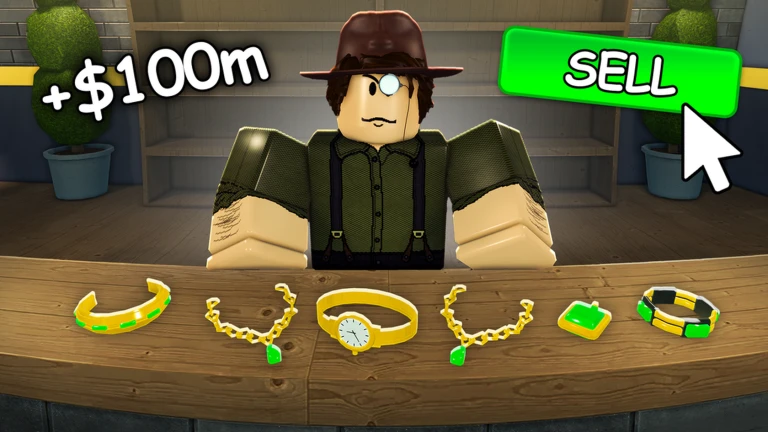
- Jewelry Empire smelting converts mined ores into metal bars used in nearly every jewelry recipe.
- Smelt before selling: bars are crafting ingredients, and crafted jewelry sells for 2x to 12x raw material value.
- Priority order: Gold and Silver bars power the most profitable recipes — stockpile them first.
- Best loop: mine ores → smelt bars → cut gems → craft jewelry → sell during bonus windows.
- Common mistake: dumping raw ore at the seller instead of running it through the forge first.
How the Smelting System Works
Smelting is the middle step of Jewelry Empire's core tycoon loop: mine raw ores, refine them into metal bars, then combine bars with cut gems at the crafting station to produce rings, necklaces, and crowns. Skipping the smelting step is the single most expensive mistake new players make, because raw ore sells for only a fraction of what finished jewelry pays.
The launch version of the game introduced the first set of ore types — coal, iron, silver, and gold — with the forge and smelting stations forming the backbone of the economy. Later expansion updates added higher-tier ores in deeper mine zones, which smelt into bars used in top-tier recipes like tiaras and gem-encrusted crowns.
| Ore | Smelted Output | Main Recipe Use | Priority |
|---|---|---|---|
| Coal | Coal/low-tier bar | Early-game starter recipes | Low — only at the very start |
| Iron | Iron Bar | Basic crafting, early income | Low |
| Silver | Silver Bar | Silver Ring, Pearl Earrings | Medium — steady early demand |
| Gold | Gold Bar | Gold Necklace, Diamond Bracelet, Royal Tiara, Crown | High — used in nearly all top recipes |
Raw ore prices are a fraction of finished jewelry value. Always run ore through the smelter and the crafting station before selling — even the cheapest ring recipe roughly doubles a gem's value.
Step-by-Step Smelting Workflow
Follow this workflow to turn every mining trip into maximum profit. The tighter your loop between mine, smelter, and seller, the higher your coins per hour.
Mine and sort your ores
Run your route — spawn shaft, mid-tier cave, then deep zone — and prioritize Silver and Gold nodes over coal and iron. Deep-zone ores are worth exponentially more, so unlock mine teleports as soon as you can afford them.
Carry ore to the forge station
Interact with the forge (marked with the interact button) to open the smelting menu. Check your backpack capacity — upgraded inventory means fewer trips and longer smelting sessions.
Smelt ores into bars
Convert your ores into Silver and Gold bars. Gold bars feed almost every high-value recipe, so keep a running stockpile rather than smelting only what you need right now.
Cut and match your gems
Sort gems by tier before crafting. Matching gem tiers in recipes like the Gold Necklace triggers a quality bonus that boosts final sale value.
Craft, then sell at the right time
Combine bars and cut gems into jewelry. Watch for rotating special buyers and event multipliers — selling a Royal Tiara or Crown during a bonus window can double or triple the payout.
Instead of smelting after every small mining run, save up a full backpack and process everything in one session. This keeps you in the mining zones longer, where the real money is made, and reduces travel downtime.
Smelting Outputs and Recipe Value
Each smelted bar feeds a specific family of recipes. Understanding which bars to stockpile helps you decide which ore nodes to target on every mining trip.
| Recipe | Bars Required | Other Materials | Value Multiplier | Best Use |
|---|---|---|---|---|
| Silver Ring | 2x Silver Bar | 1x Cut Gem | ~2–3x raw gem value | Early-game steady income |
| Pearl Earrings | 1x Silver Bar | 2x Pearl | ~3x raw pearl value | Cheap filler crafting |
| Gold Necklace | 3x Gold Bar | 3x Cut Gems (matched) | ~4–5x raw gem value | Mid-game workhorse recipe |
| Diamond Bracelet | 4x Gold Bar | 2x Cut Diamond | ~6–8x raw gem value | Best use for rare diamonds |
| Royal Tiara | 6x Gold Bar | 5x Cut Gems (high-tier) | ~8–10x raw gem value | Daily high-value sale bonus |
| Gem-Encrusted Crown | 8x Gold Bar | 8x Cut Gems + 1x Rare Gem | ~12x+ raw gem value | Endgame event sales |
The pattern is clear: Gold Bars are the bottleneck for every high-value recipe. A single Gem-Encrusted Crown consumes eight of them, so a deep stockpile of gold ore is what separates casual players from leaderboard contenders.
Early Game: Silver Focus
- Smelt Silver Bars for Silver Rings
- Cheap craft cost, quick sales
- Funds your first pickaxe upgrades
Mid Game: Gold Stockpile
- Shift mining toward Gold Ore
- Craft Gold Necklaces with matched gems
- Biggest income jump in the game
Late Game: Crown Production
- Maintain 8+ Gold Bars at all times
- Save high-tier gems for Tiaras and Crowns
- Time sales with special buyer bonuses
Upgrade your pickaxe before anything else. Mining speed compounds into every bar you smelt and every piece you craft — skipping a pickaxe tier to save coins is the most common progression killer.
Smelting Upgrades and Boosts
Smelting throughput depends on more than just ore supply. Several systems in Jewelry Empire multiply how much value you extract from each smelting session.
| Boost Source | Effect on Smelting Income | Value Rating |
|---|---|---|
| Pickaxe upgrades | More ore per trip = more bars per session | ★★★★★ |
| Backpack / inventory upgrades | Fewer trips, longer sessions | ★★★★ |
| 2x Money Gamepass | Doubles all sale earnings permanently | ★★★★★ |
| Shop upgrades | Higher sale prices, richer buyers | ★★★★ |
| Daily login rewards | Free materials and currency fund upgrades | ★★★ |
Economy-focused updates have also rebalanced crafting material costs over time, so check the in-game forge menu for current smelting requirements. Special buyer events rotate regularly — stockpile finished bars and crafted pieces so you can respond the moment a bonus window opens.
The developers ship content regularly, including new ore tiers and rebalanced material costs. Check the official game page and developer social channels for patch notes before planning long crafting sessions.
Smelting Mastery Checklist
Track your progress toward a fully optimized smelting operation with these milestones.
Smelting Mastery Milestones:
- Stop selling raw ore — smelt and craft everything first
- Reach a Gold Pickaxe tier to unlock diamond and emerald nodes
- Maintain a stockpile of 8+ Gold Bars for crown recipes
- Unlock mine teleports to shorten your mining route
- Upgrade backpack capacity for longer smelting sessions
- Sell a Royal Tiara or Crown during a special buyer bonus window
FAQ
Q: Should I sell raw ore or smelt it into bars first in Jewelry Empire?
Always smelt first. Raw ore and raw gems sell for a fraction of their crafted value. Running materials through the smelter and crafting station multiplies value anywhere from 2x to 12x depending on the recipe.
Q: Which bars should I prioritize smelting?
Gold Bars are the priority because nearly every high-value recipe — Gold Necklace, Diamond Bracelet, Royal Tiara, and Gem-Encrusted Crown — requires them. Keep Silver Bars flowing early game for Silver Rings and Pearl Earrings.
Q: What is the best smelting loop for coins per hour?
A tight loop works best: spawn shaft to mid-tier cave to deep zone, teleport back, smelt everything, craft, and sell. Unlock mine teleport points early to cut travel time, and time big sales with special buyer bonuses.
Q: How do pickaxe upgrades affect smelting?
Better pickaxes mine faster and unlock rarer ore nodes, which means more high-tier ore per trip and more Gold Bars per smelting session. Pickaxe upgrades are the highest-value investment feeding the entire smelting economy.